Capture & Submit Billing — For Physicians
This is where SmartSubmit saves you time and revenue. Add MBS item numbers at the bedside and submit — no more post-it notes, no more billing from memory days later.
The complete workflow looks like this:
Add Your Patient
Use Scan label, Find a patient, or Enter new patient to add the patient (see Section 3 above).
Add Item Numbers
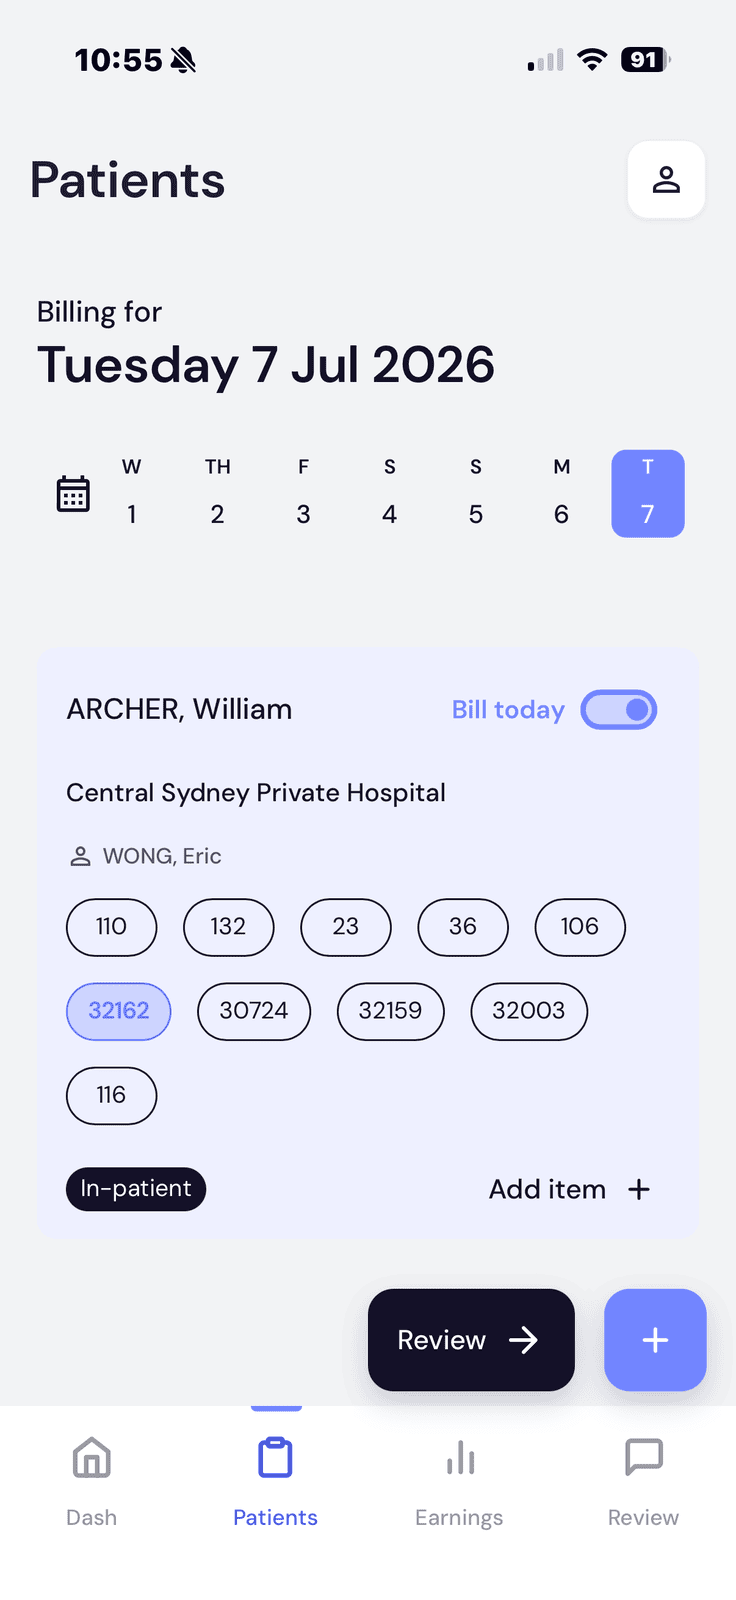
Now add the billing codes for services provided. Previously billed Items will automatically appear against the Patient.
Now add the billing codes for services provided. Previously billed Items will automatically appear against the Patient.
- Click "Add item +" — Available in both LIST and DETAIL views
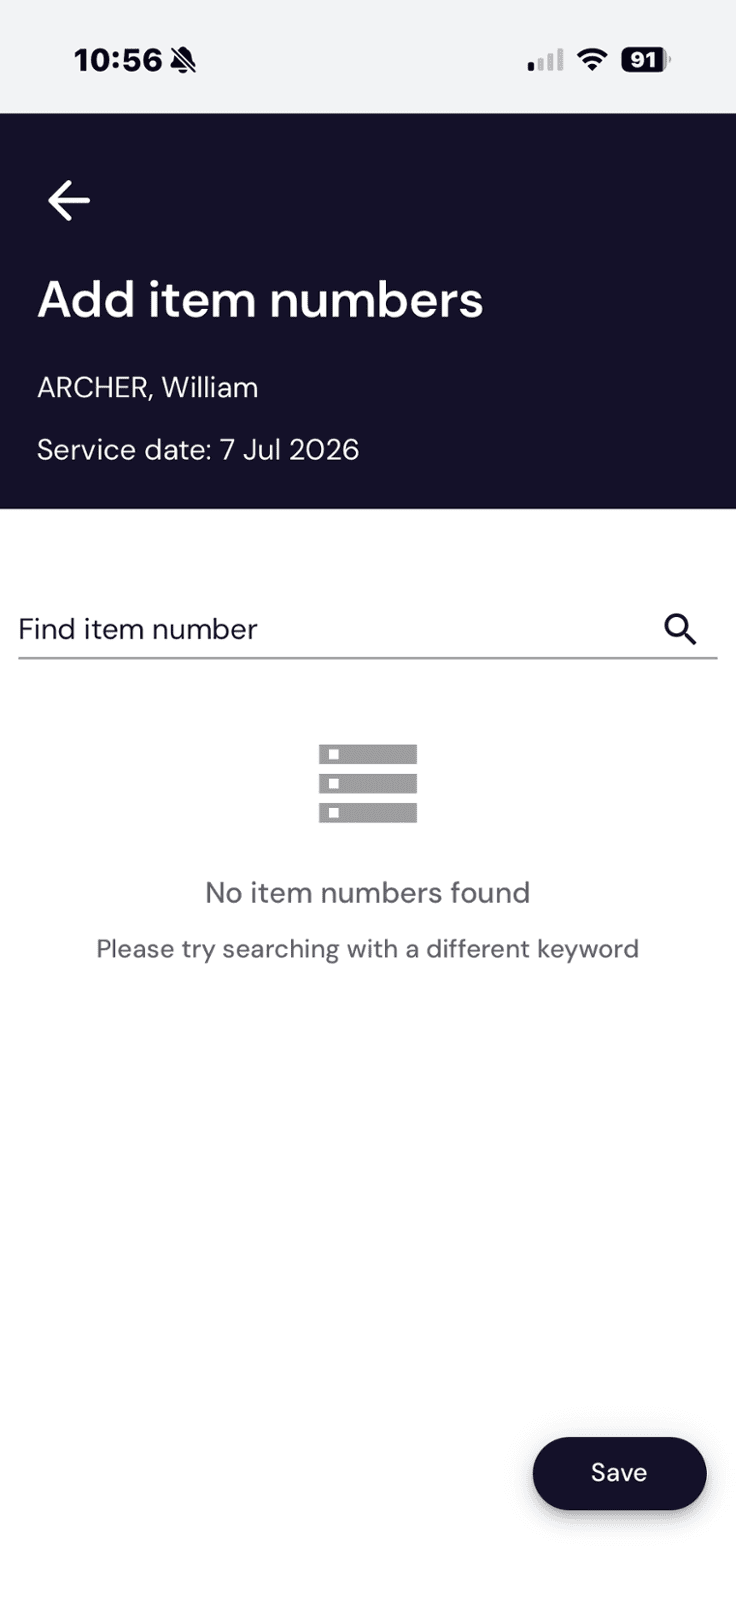
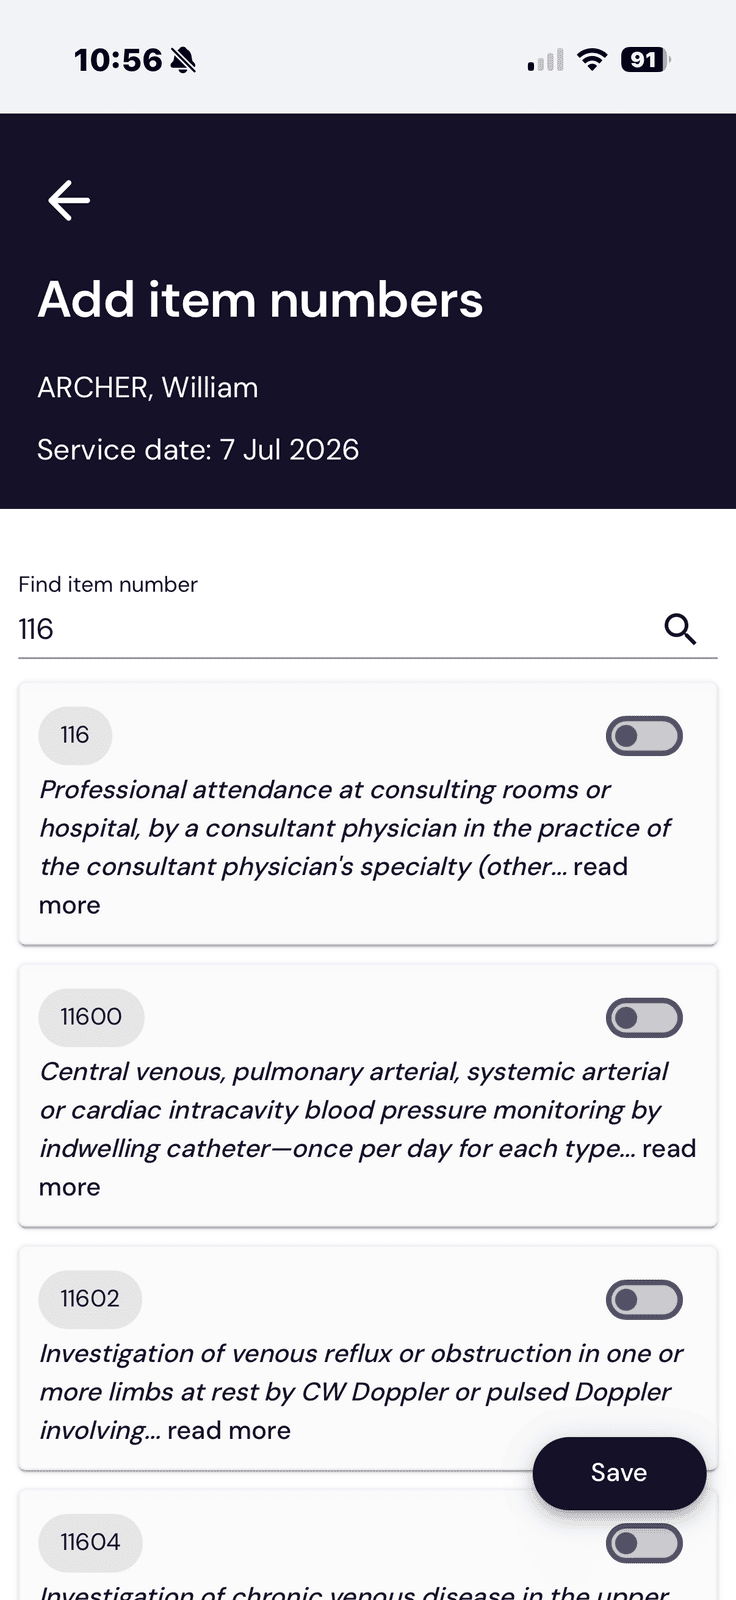
- Search for item — Type code (e.g., "232") or keyword ("bone")
- Toggle items ON — Switch turns blue when selected
- Adjust quantities — Use - and + buttons
- Click "Save" — Black button in bottom right
You can add multiple item numbers at once. Select all needed codes before clicking Save.
Switch to DETAIL View
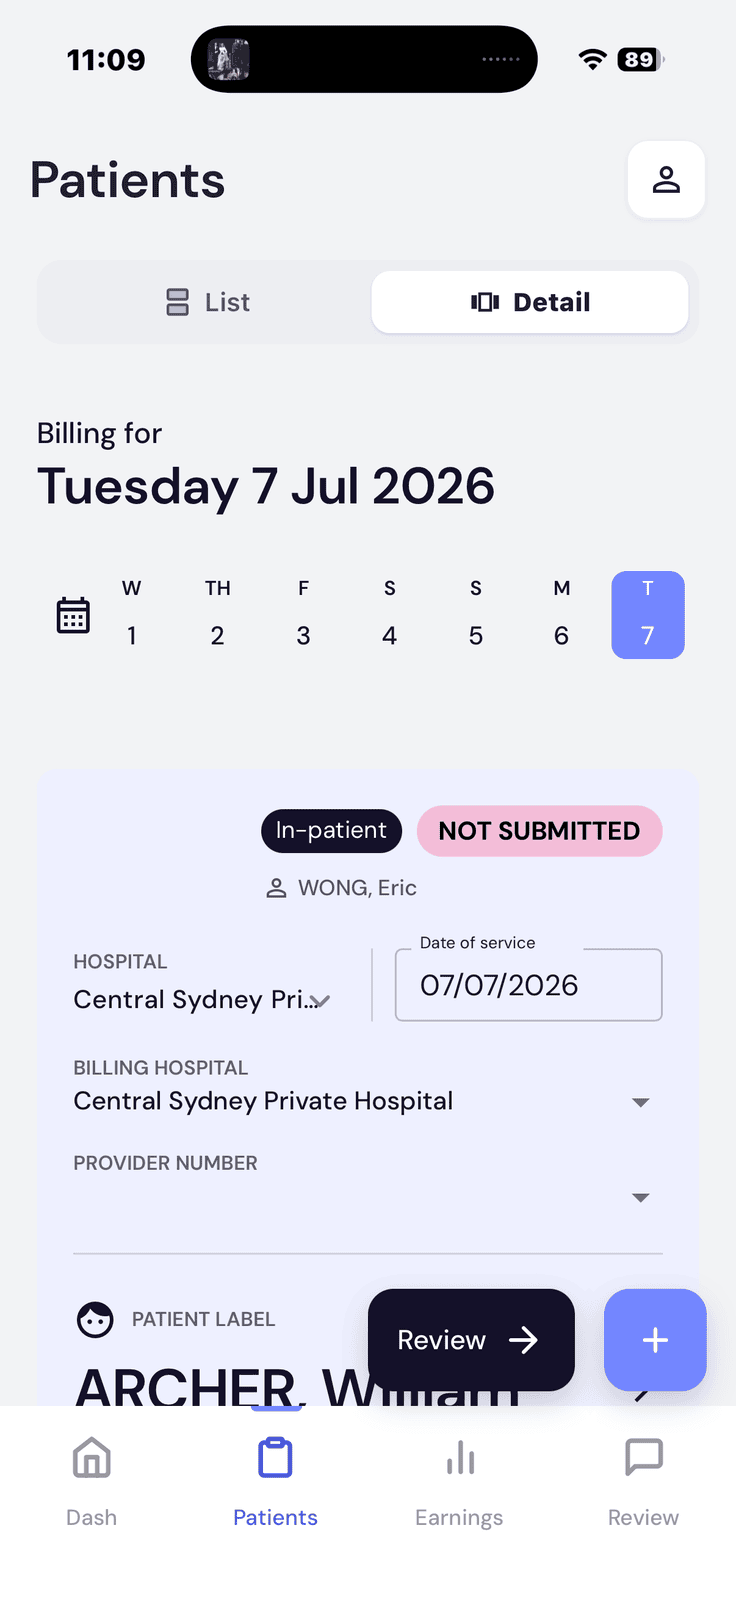
Before submitting, always review in DETAIL view.
- Click "DETAIL" — Top center of screen
- Select the patient — Click on their card
- Review info — Check patient, provider, items
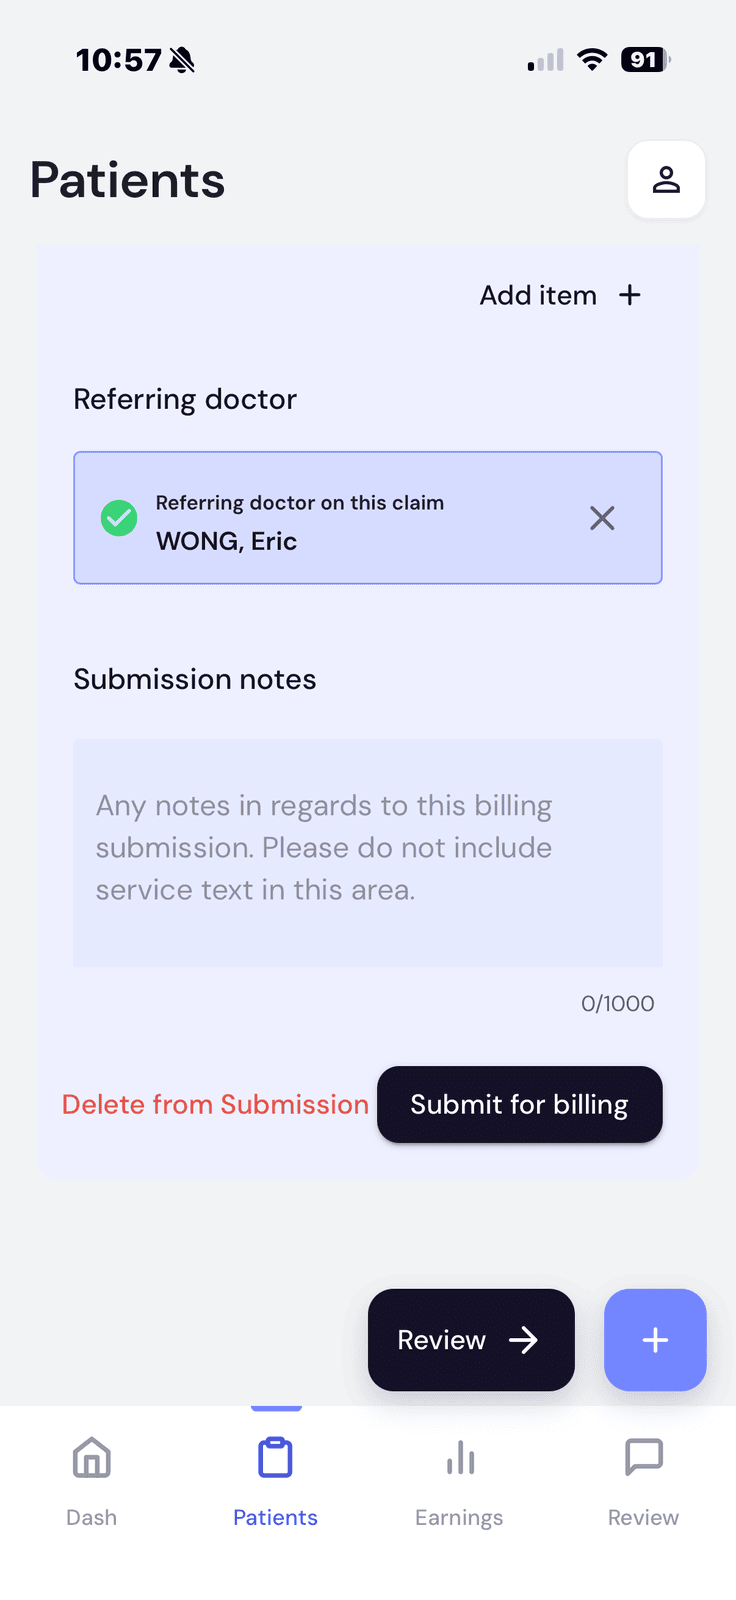
Add Notes
Optional but recommended. Add relevant details.
Specific procedures performed · Special circumstances or complications · Reasons for multiple services · Billing clarifications
- Find Notes section — Below item numbers in DETAIL view
- Type your notes — Max 1000 characters
"Patient presented with acute pain. Performed comprehensive examination including imaging. Multiple item numbers due to complexity of case."
Submit for Individual Patients Billing
Final step — submit for processing by Medbill.
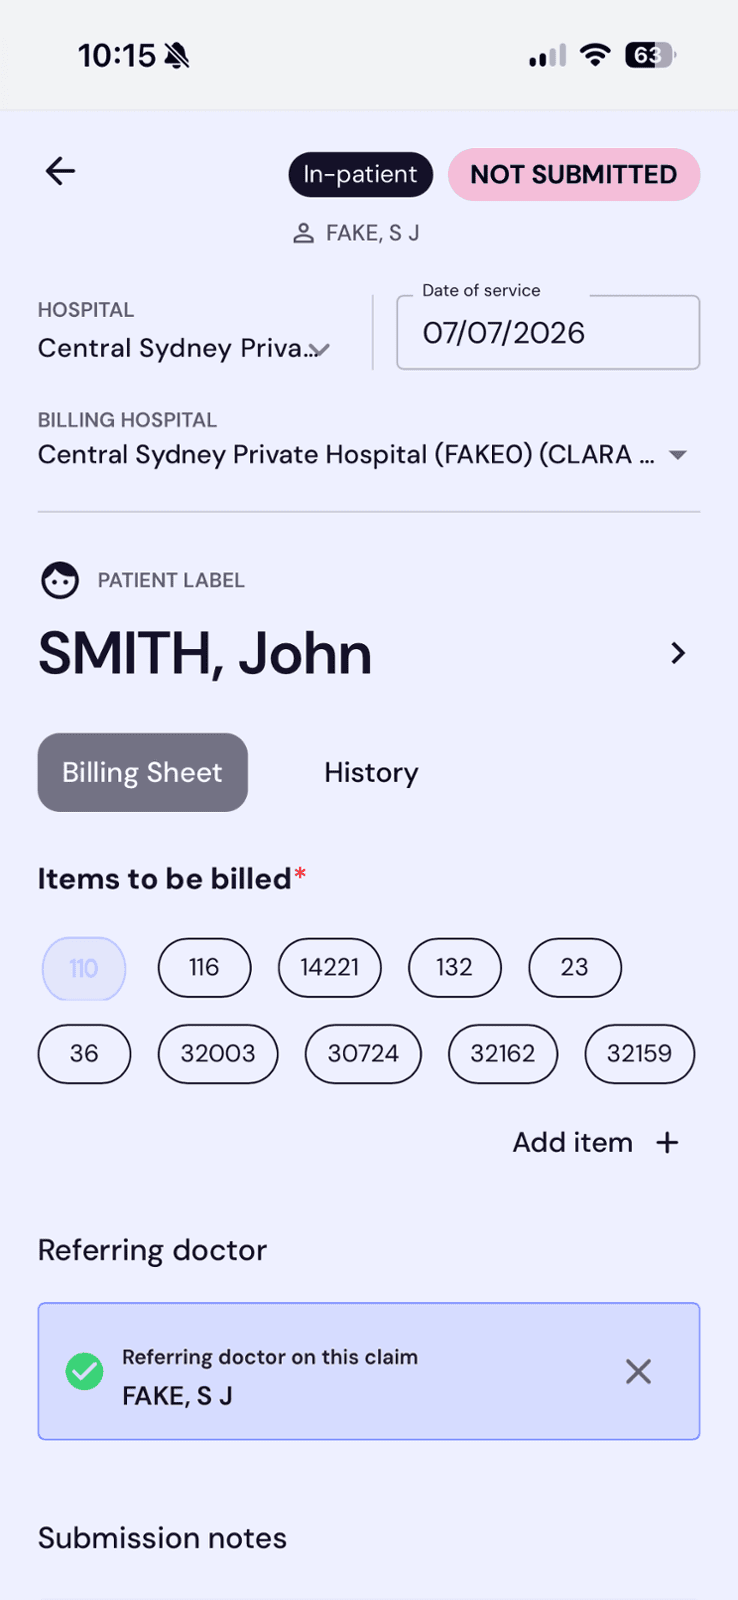
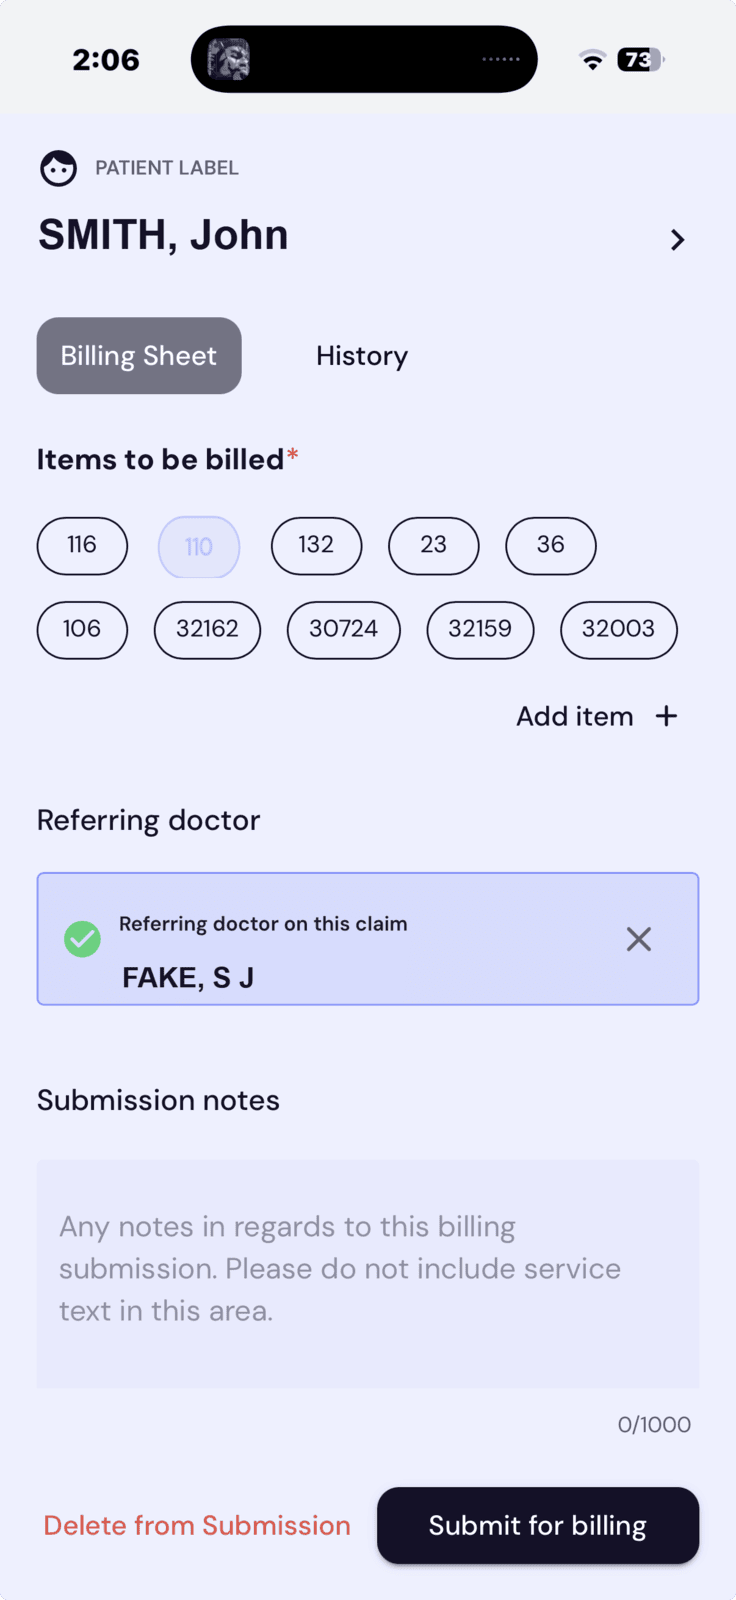
- Do a final review
- Check status banner — Should say "NOT SUBMITTED"
- Click "Submit for billing" — Black button at bottom
- Confirm submission — Status changes to submission date
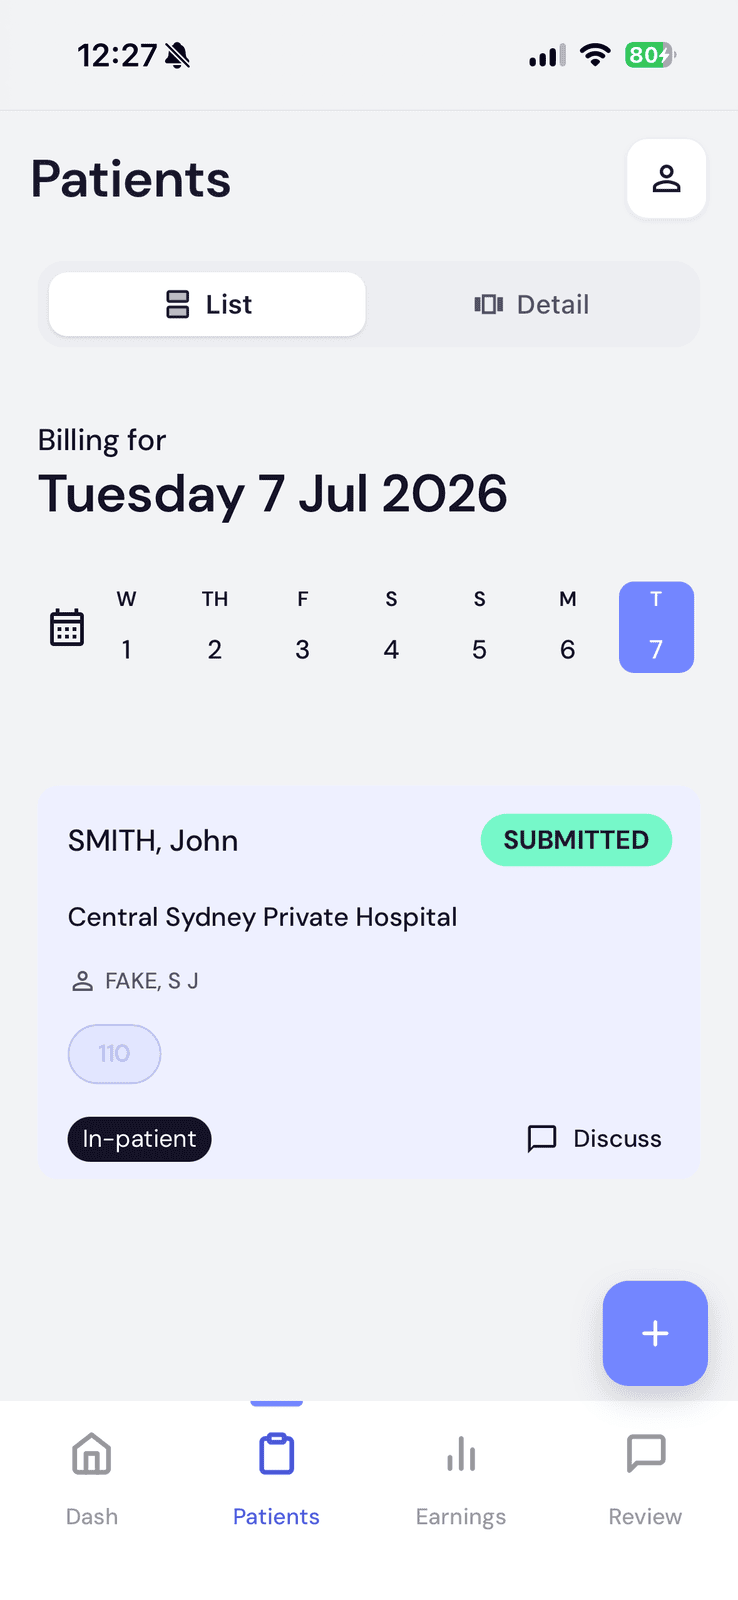
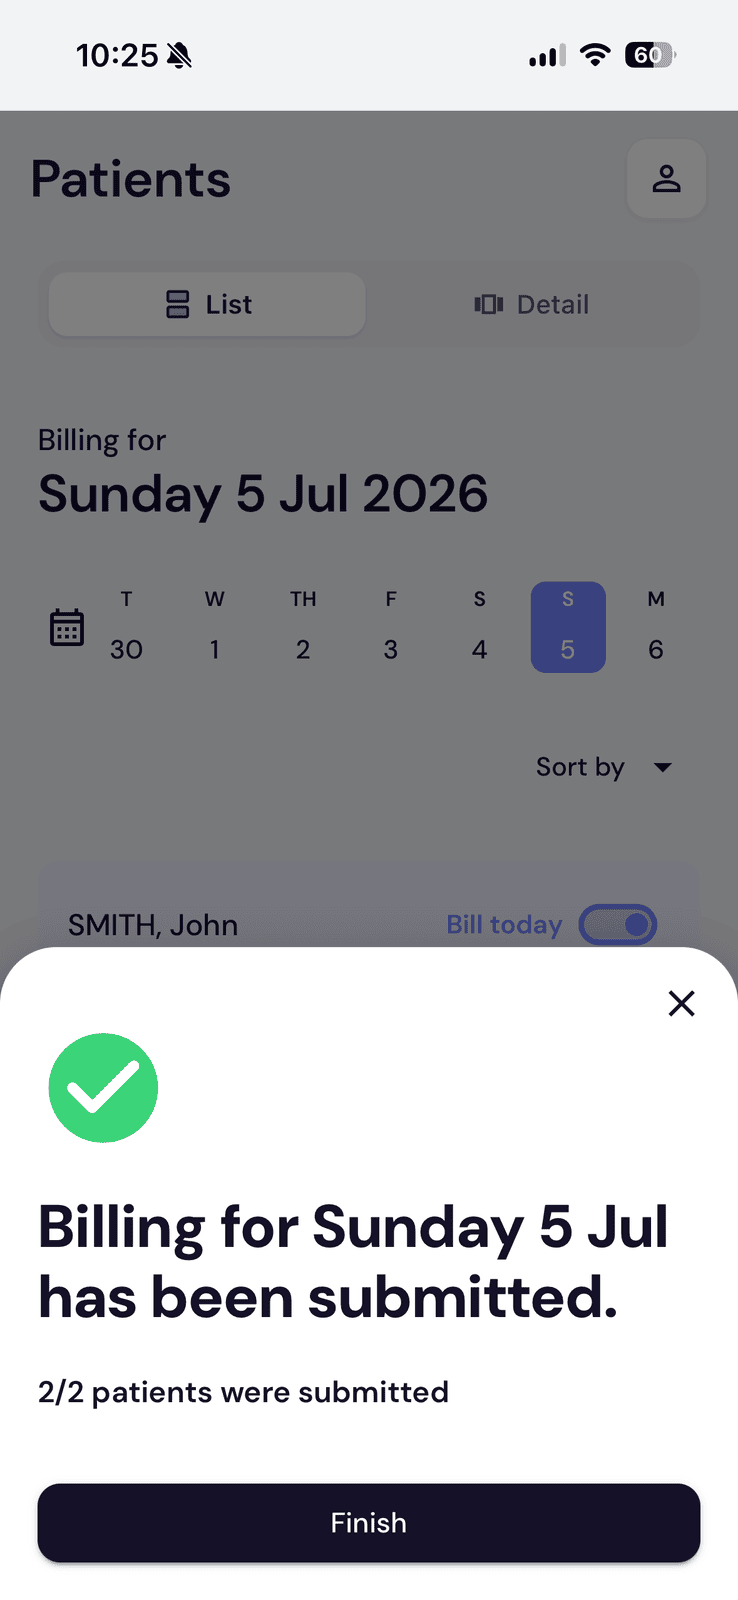
Billing submitted. View status in History tab.
Review All Submissions
After submitting multiple patients, review the day's total:
All patients submitted · Total billing amount · Individual details · Timestamps
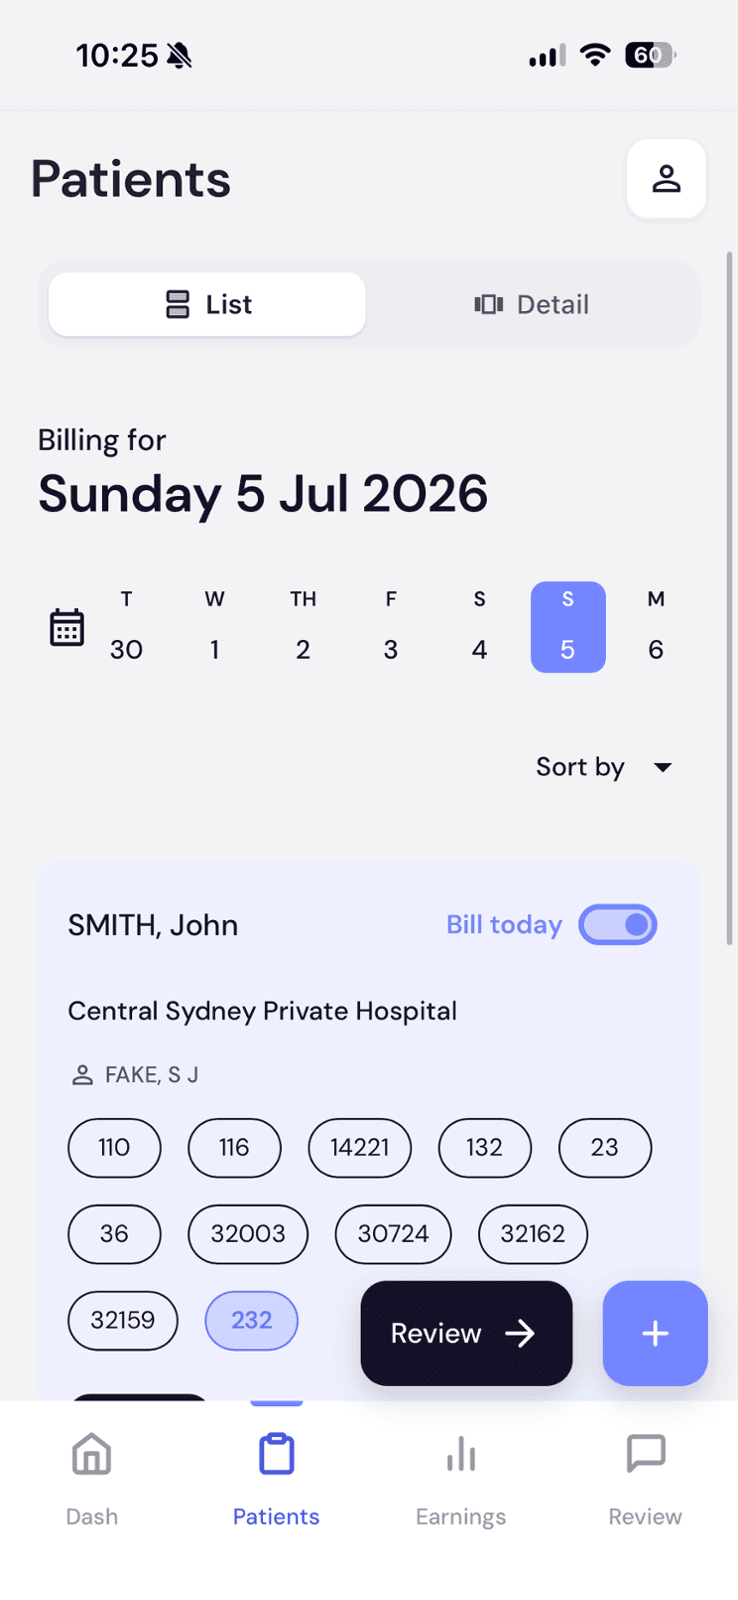
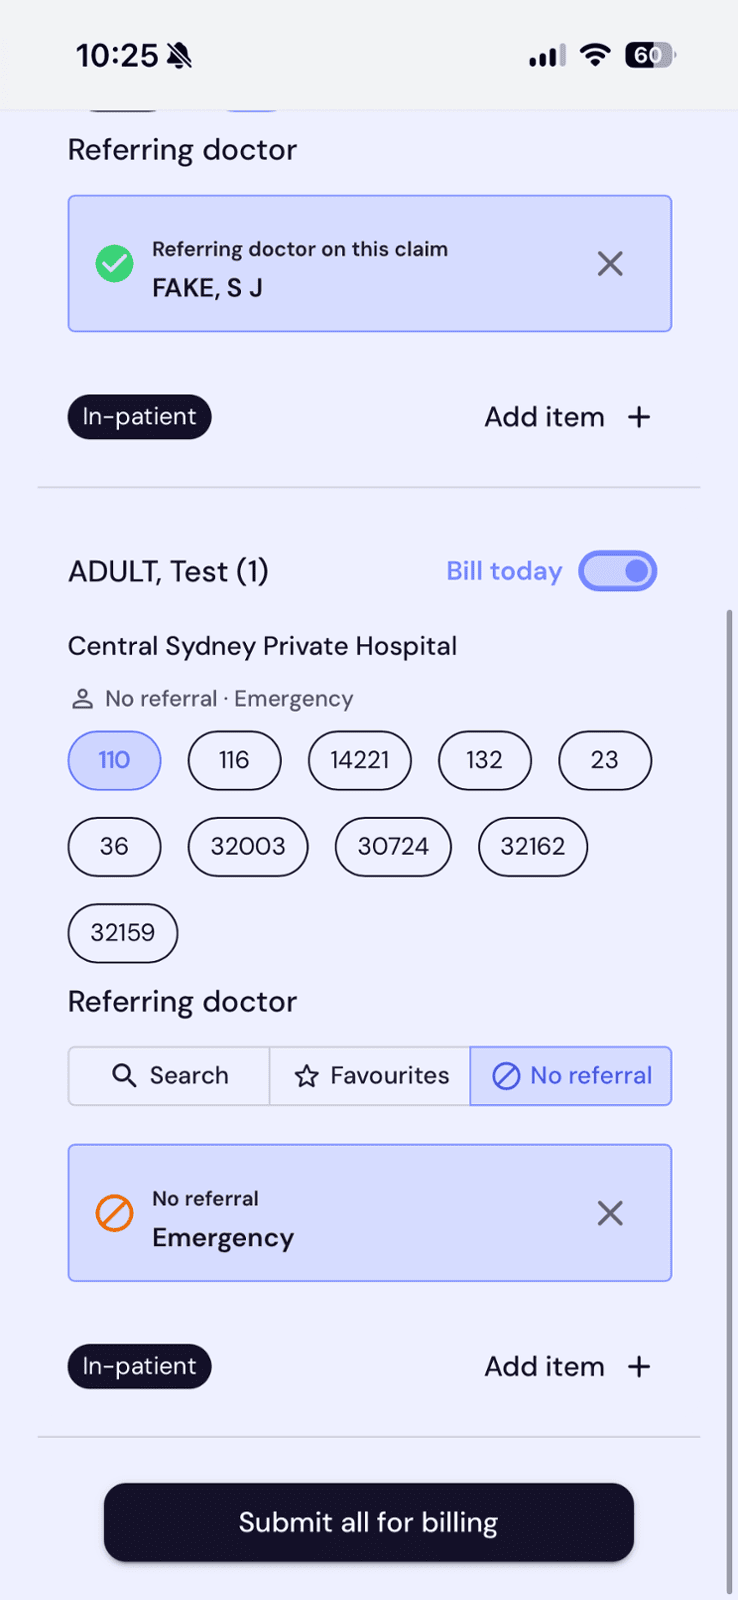
List View is great for a quick overview, but always switch to Detail View to review patient info, notes, and item numbers before tapping Submit.